Installation
Illumi-WELD is easy to mount into any welding helmet. We have provided a step by step installation video below for your reference. The instructions in the video apply to all brands of compatible welding helmets. Please watch the video in its entirety to get familiar with the installation. Once you have watched the video, you are now ready to follow the steps and install your light. We have provided a T6 hex screw bit, 2.5mm drill bit and an additional screw in the Illumi-WELD kit for your convenience. In addition you will need a fine tip marker, an exacto knife or utility knife, masking tape, a corded or cordless drill and finally a 9/32" drill bit to complete the installation.
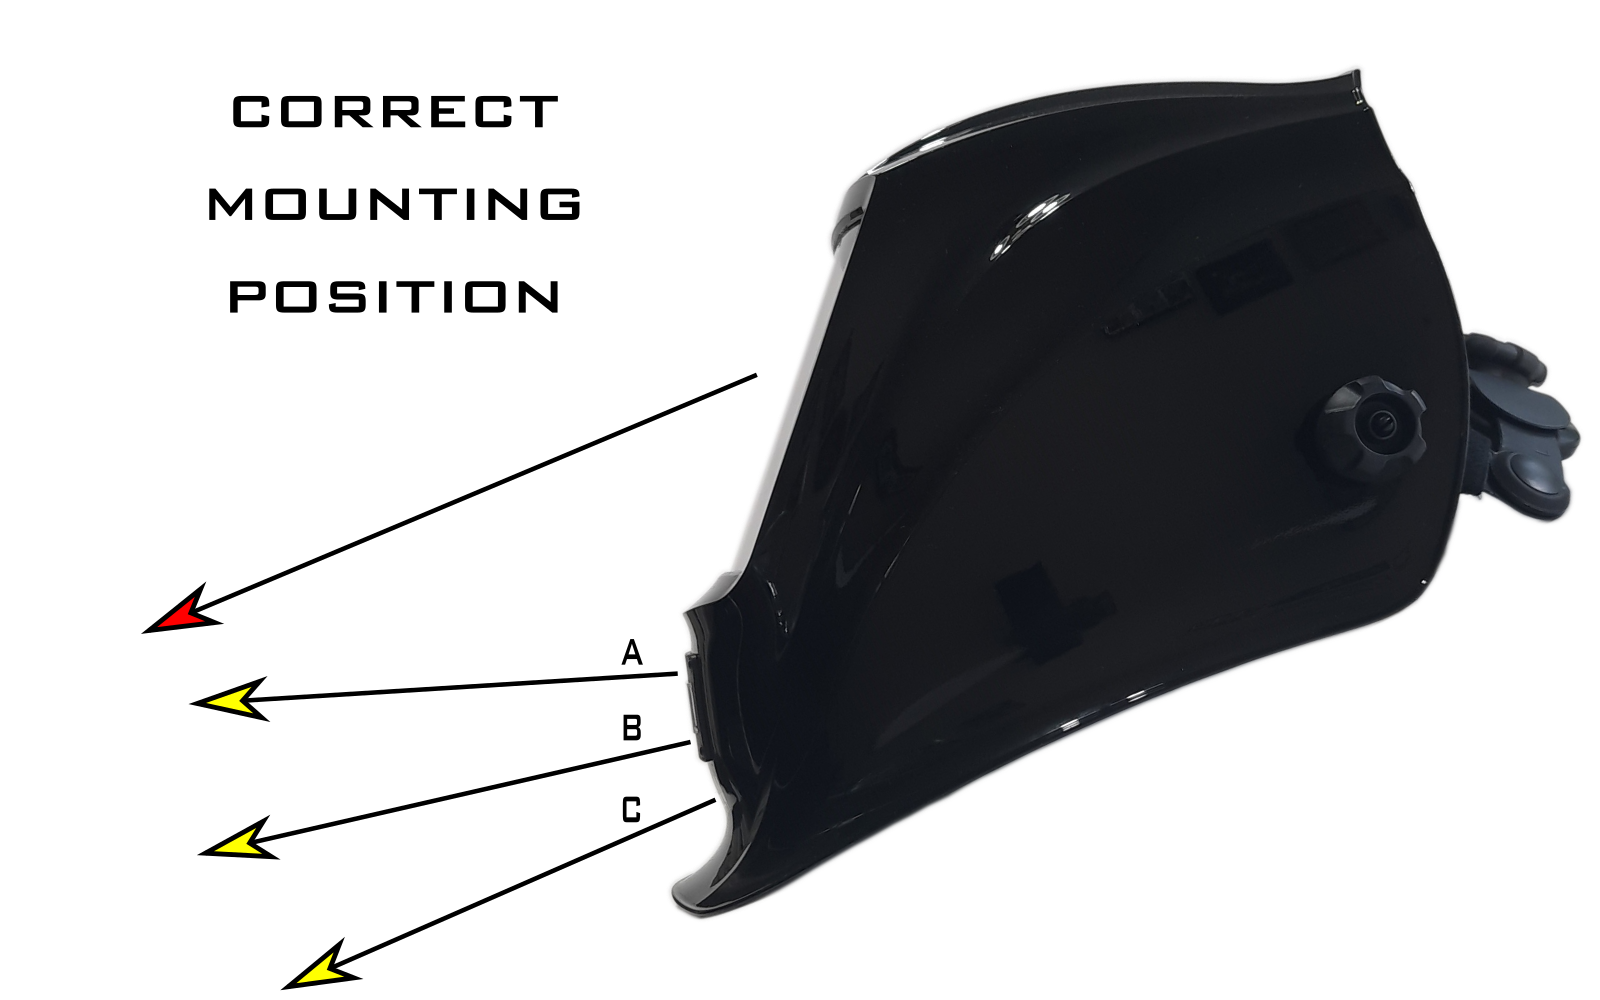
Depending on the curvature of the chin from top to bottom, the optimal mounting location is as close to the viewing lens as possible. The light's beam is rectangular in shape. Position A is the best for a rounded chin as it will direct the light towards the viewing direction. Position A and B is best for a flat chin. Position C is best avoided if possible. When in doubt the higher the better.
You will be cutting and drilling your welding helmet. You should check to see if modifications to the shell void any of your manufacturers warranties. Illumiweld LLC or any of its distributors / retailers will not be responsible or liable for any damages that might occur as a result of you performing the installation or someone else performing the installation on your behalf.
Tip:
The light has a sensor under the black cone that detects ultraviolet light. The purpose of the sensor is to turn the light off during the welding process to conserve battery power and back on when you stop. If you wish to have the light remain on all the time you can put a little piece of black electrical tape over the opening. If the cone comes loose just line up the tabs with the holes and put a dab of superglue to hold it.